Contents
One of the greatest thrills we get in our edible garden, apart from the obvious produce, is using seeds from last seasons crop (or the seasons before) to grow more produce.
Seed saving is a great way to keep growing the fruit and vegetables that you have enjoyed most, preserve heirloom lineage and save on constantly buying new seed.
Saving seed is easy and without a whole lot of effort, you can end up with lots of free seeds for planting in seasons to come. Or to trade or give away to friends and family.
In this Seed Saving series you will get instructions on how to save all sorts of seeds to stock up your seed supply.
Saving Tomato Seeds
Our Tomatoes are coming to the end of their reign in our edible garden.
They have been amazing this year and we have had more than our fill of delicious, sweet tasting Tomatoes. The freezers are full of them, we have jars and jars of them sundried and we are now even vacuum packing sundried Tomatoes to use over the Winter months.
But before the best of them are squirreled away, I will be chopping, squishing and soaking one of each variety for their seeds.
Good Quality Seed
The key to getting good quality seeds to use next year, is to seed save from a Tomato that is true to type, healthy and ripe. Do not use any Tomatoes that are diseased, rotten or deformed. This could mean bad news for next years crop.
Also, do not use seeds from hybrid plants as these will not grow true to form.
If you have grown multiple varieties of Tomatoes, choose fruit from each of these that has the best colour, taste and shape that you want to continue with next Summer (and beyond).
Preparing The Seeds
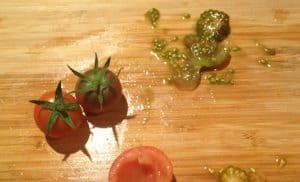
On a clean board, with a sharp clean knife, cut the Tomatoes in half across the equator. This makes it easier to scoop the seeds out, compared with cutting the Tomato lengthways as you might usually do.
Next, using clean hands, scoop the gelatinous gooey part containing the seeds out of each of the ‘chambers’ of the Tomato with your finger.
Either discard or use the rest of the Tomato, saving the seeds in their gel coating for soaking.
More Than One Method
What I am going to detail here is the full, fermentation method for preparing your seeds for storage but some gardeners, and growing specialists, don’t bother with the extra effort. They simply soak the seeds for a few days to get the bulk of the pulp and gel away from the seed and then dry the seed with whatever coating is still in place after a thorough ‘wash’. Germination in most cases doesn’t seem to have been a problem at all.
That said, I want to share the full fermentation method with you as this is said to remove the germination inhibitors, naturally cull the ‘bad’ seeds and kill of any unwanted bacteria. It is also considered good practice if you are trading seeds. No one wants rogue seeds.
You can make the choice which method you will use.
Fermenting The Seeds
Put the seeds into a small bowl or jar, and cover them with half a cup of water. Make sure you remember to have a separate container for each variety of Tomato so you know what you are planting next year.
Cover the jar with a small piece of cheesecloth or muslin and put the container somewhere warm.
Over the next few days the seeds will begin to ferment, which breaks down any bacteria that might still be with them, and also pulls the gel away from the seed.
The water will become murky and may emit a bit of a smell. You will also start to see mold forming on the top of the contents. When you have a good layer of mold on top, this is when the fermentation is done.
The good seeds will have sunk to the bottom of the container, the bad seeds will float to the top. These should be discarded as they won’t be any good for planting.
Pour the good seeds into a fine sieve and rinse the seeds thoroughly with warm water. Carefully move the seeds about to make sure any last bit of the gel are washed away leaving just nice, clean seeds.
Drying The Seeds
Cover a small, flat plate with wax paper or use paper plates. I don’t recommend using paper towels as the seeds tend to stick to them.
Tap the seeds out of the sieve onto the plate and spread the seeds around so that are lying in a single layer ready to dry.
Leave the plate somewhere that is well aired, dry and safe so the seeds can dry. Regularly move the seeds around so that all sides of the seeds are dried and then make sure they are left in a single layer again to keep drying.
Storing The Seeds
Once the seeds are completely dry, scoop the seeds up and store them in paper envelopes or small zip lock bags. Just make sure that if you are using plastic zip lock bags that the seeds to ABSOLUTELY dry as being enclosed in plastic with ANY moisture at all will cause them to rot.
Label your packets and store your seeds in a dry, cool place until they are ready to be used.
Want to know more about gardening ?
Fill in your email address in the form below and you'll receive all the latest updates directly in your in-box.
Thank you for subscribing.
Something went wrong.
